Help me by sharing this blog with your friends and by generating some income for me by clicking through on my sponsor's Google ads. Thank you!

Search This Blog

Wednesday, March 31, 2010

Traveling – Piran, Slovenia

As part of our fall 2007 Europe trip, we drove from Lake Bled Slovenia to the Postojna region of central Slovenia where we stayed several nights on a working farm.  This region of Slovenia is best known for it’s caves, the white Lipizanner stallions, and castles.  We partook in all these experiences and along the way met some wonderful people.

At our Tourist Farm Hudicevce, we met some fellow travels Jan and Ted (from Monterey, California) and invited them to take a drive with us to the town of Piran which is located on the seacoast.  Piran is a beautiful little town situated on the Adriatic Sea and is the Western most point of Slovenia.  Looking across the Adriatic Sea, in the distance it is possible to see the coast of Italy.

We parked the car and walked past the small harbor containing brightly painted fishing boats to the center of town.  It was getting close to lunchtime, so we found a small patisserie on a side street and purchase several pieces of quiche to take with us.  We walked a block to the seawall where we could look out over the sea and had a very nice lunch in the sun.


After lunch we walked the along the seawall around the town enjoying our views of the buildings aw well as the people.  On our way back through the town, we happened on a street market with fruits and vegetables that were very fresh and colorful.  We saw a fruit that none of us had ever seen before called Zizola.


Zizola are a small fruit about the size of a large olive and have a soft brown coating (shell?) that you peel off with your thumbnail to eat.  The fruit is slightly bitter but refreshing.  We purchase a bag of the fruit to take with us.  As we walked through the town we snacked on the Zizola, but I was a little concerned about eating too much of the fruit and the unknown effects it could have on a digestive system (I’m happy to report no negative effects).

When we left the town of Piran, we decided to drive a few miles to where we could cross the border into the country of Croatia.  We stopped at a tourist site which is a salt making facility that has been used for hundreds of years.  It is located next to the sea in a low flat marsh area between Slovenia and Croatia.  We were fascinated by the methods and tools used in the production of sea salt from the region.  This salt facility was also quite picturesque with white buildings framed against the blue sky.  Our driving tour of Croatia lasted about thirty minutes as we drove through a few towns, and then back to Slovenia.


When we returned to our tourist farm, we were treated to a beautiful red and pink sunset.  I walked all over the farm taking pictures as the sun set between the hills.


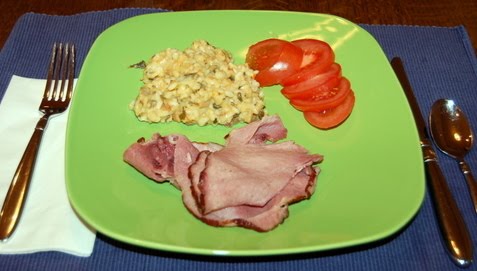
We had a nice dinner that we finished with caraway seed liqueur the hostess offered us.  Earlier in the evening, I talked with the hostess as she poured drinks in preparation of a party being held on the farm.  She had four rows of glasses lined up and the first held a yellow liquid (the caraway seed liqueur), next row contained a green liqueur (mint), then a row containing white liqueur (anise), and the last row was filled with a brownish (molasses liqueur).  All these liqueurs they made on-site.  She let me sniff the contents of one of the large liqueur bottles and it was so potent, I was sure it would strip paint off a wall.  The caraway seed liqueur was tasty but very strong (like fire).  After some very nice conversation with our friends, we had a very nice rest.

When we travel, we try to stay in smaller bed and breakfasts, hotels, or in this case, a tourist farm that only has about eight rooms.  The remote and intimate setting allows meeting other guests from a variety of locations and being able to talk and compare experiences.  We continue to communications with some of the people we have met and we always exchange address information with people we meet.  The family that runs the tourist farm was very friendly with many children that helped with meals.  We got to know their names, ages and interests which really enhanced the experience of our visit with them for all us.

We had a few more days of sight seeing in the area, and then it was on to Milan Italy.

Adventures In Food: Author: Kerry Howell

Tuesday, March 30, 2010

New Dinnerware

During our kitchen remodel, there were several items that we planned to replace or augment when we were done. These are to replace our Teflon skillets and to add new colored dinnerware. (I had to look up the proper name of dinnerware to describe plates, bowls and mugs because that is what I would call them: plates, bowls and mugs!)


Many years ago, we purchased new pieces of dinnerware called cafe ware and these pieces are all white. This worked well for a number of years, but with the new kitchen, we wanted to have some more exciting colors. In January, we purchased some red plates and bowls, which we really like, and it inspired us to look for additional colors.

We recently stopped at the local kitchen store: Kitchen Kaboodle to see what was available. We didn’t like the green color offerings found on may of their dinnerware pieces, but then we arrived at the last items on their shelves from Sengware.

The Sengware offered a bolder green (pistachio) then the other dinnerware product lines so we checked the price. As it turns out Kitchen Kaboodle is closing out their sales of Sengware (maybe because Target it now offering it) and all the product was 60% off. This means we could purchase dinner plates for $5.18 each. We bought several different plates in a variety of colors; pistachio, pomello, pimento. We were unsure of the orange color (tangerina) so we just purchased a couple of mugs to check out the color when we got home.


We really enjoy how these pieces of dinnerware look (even the tangerine). We went back yesterday and purchased a large tangerina bowl (this matches the green bowl we purchased as shown in the photo with the fruit) and now we want to go back and look for some smaller soup bowls in the different colors.

Now when we prepare different dishes, we have to consider how it will look with the different colors. For instance, last night we had some spiral sliced ham from Costco with a Italian Style Risotto (also from Costco). This was a fast meal to prepare as it was late when we arrived home after exercising. We also cooked some green beans, but we thought they would not look as well on the green (pistachio) plates, so I sliced some tomatoes to add some contrasting colors.

Now there is just one more thing to think about, does the chicken recipe look best on the yellow or green plates? Now what vegetable provides the proper contrast? I may have to occasionally use the white plates.

Adventures In Food: Author: Kerry Howell

Monday, March 29, 2010

Howell Caramel Corn

I decided it was time to share our families “secret” recipe for caramel corn with everyone.  This is a recipe that my sister gave me many years ago.  Every year, starting just after Thanksgiving, I make multiple batches to share with family and neighbors for Christmas.

Howell Caramel Corn
  • 1-cup margarine (Gold n Soft stick margarine, 2 sticks)
  • 2-cups brown sugar (I buy the 25-pound bag at Costco)
  • 1-teaspoon salt
  • 1/ 2-cup light corn syrup
  • 1-teaspoon baking soda
  • 1-teaspoon Vanilla
  • 6-quarts of popped popcorn. 
I like to use Jolly Time yellow popcorn popped in an air popper.  This eliminates any extra oil in the popcorn (with one-cup of margarine, there will already be enough fat).  In the past, I tried Orville Redenbacher popcorn, but it is way too energetic in the air popper and at least half the kernels blow out un-popped.  Orville’s popcorn works ok in my WhirleyPop on the stove top, but you have to use some oil in that popper.

I like to pop my popcorn at lower heat, so that I get random looking shapes.  If you cook popcorn using too high of heat, you get round balls that look like cauliflower (I call them brains), and they are dry and stiff.
  1. Heat oven to 250 degrees (225 degrees if using a dark pan like Bakers Secret)
  2. Mix the margarine, sugars, salt, and corn syrup in a heavy saucepan.  Stir constantly while heating on medium until everything is melted.
  3. Increase the burner heat until the syrup starts to boil then let it low boil for 5 minutes stirring occasionally.  (The recipe calls for not stirring during the 5 minutes, but I always stir).  If the syrup smells as if it’s burned, then your heat is too high.
  4. Remove the pan from heat and stir in the baking soda and vanilla.  The syrup will start to turn a very light tan color and increase in volume as it foams.
  5. Pour the syrup over the six quarts of popcorn and stir to get an even coating on all the pieces.  We use a very large ceramic bread bowl for this step.  I start with 4 quarts of the popcorn in the bowl then add the syrup.  My wife stirs to coat the popcorn with two large Teflon spatulas while I add the rest of the popcorn and then scrape the remainder of the syrup out of the pan.
  6. Divide the coated popcorn into two non-stick baking pans.  I use two 9x13 Bakers Secret cake pans, the high sides do a very good job of containing the caramel corn while stirring.
  7. Place the pans into the heated oven for 15 minutes.  After 15 minutes, remove the pans from the oven and stir the contents.  Replace the pans in the oven swapping the pan positions (top to bottom location, bottom to top) after every stirring.
  8. Bake for another 45 minutes, stirring and swapping every 15 minutes.
Let the caramel corn cool for about ten minutes if you want clusters of caramel corn.  Remove the caramel corn from the pan and place in gallon sized Ziploc bags.  One 9x13-cake pan will fit into one-gallon bag.
Now enjoy the results with your friends and family.

Adventures In Food: Author: Kerry Howell

Saturday, March 27, 2010

Flourless Chocolate Cake – Take 3

This weekend while visiting my mom, I rummaged through her cupboards to find the makings for Gina’s Flourless Chocolate Cake. I brought our spring form pan from home because that was the one item I didn’t think she would have (I was correct, she doesn’t).

While my mom was away at a book club meeting, I started baking which meant that we really had to hunt to find several of the ingredients. Hardest to find where the chocolate chips and then when we did, I realized that my mom doesn’t have a scale to weigh the necessary eight ounces. A quick conference with all the people on hand sent me to the internet where I quickly found that eight ounces of chocolate chips equals 1 1/2 to 2-cups. We all agreed that in this case more is better, so I used two-cups of chocolate chips.

I put the two sticks of butter in a pan (using up all of her butter) with the chocolate chips and then added the powdered cocoa into the pan. This out of order as the cocoa powder is supposed to be added to the egg mixture, but there was a lot of activity in the house and I missed the correct order.

I put our son to work stirring the chocolate/butter mixture while I started on the rest of the recipe. Our son noted that the chocolate mixture in the pan was almost black. A quick review of the cocoa powder can revealed it is Hershey’s Special Dark cocoa powder. Ok, that’s two changes to the recipe.

I added the eggs, sugar, salt and the brandy into the mixture and started mixing. Now my mom doesn’t buy the cheap Monarch brandy like I use, she has a nice Cresta Blanca 22 year old California Brandy.

When the chocolate melted, I slowly stirred it into the egg mixture using the Kitchen Aid stand mixer. This took several minutes to get all the chocolate into the pan, but made a very smooth consistency in the batter.

I baked the cake for the fifty minutes and out of the oven came a very dark, rich looking cake that smelled wonderful. I cooled it for about two hours before transferring it to a plate for serving. I had to shake the powdered sugar onto the cake directly from the bag, but I was able to get a fairly even coating.

I served the cake after dinner with some canned whipped cream on top. I found out today that my mom has some homemade blackberry syrup that we will use tonight when we have the other half of the cake.

The dark chocolate and the better brandy added to the richness of this dessert. Some of the pieces had cracked during cooking, but that was quickly overlooked once everyone tasted the full flavor from the dark chocolate.

My wife has asked that in the future, I only make this dessert with these modifications: dark chocolate cocoa powder, good brandy, and adding the cocoa powder during the heating process. Not a problem, just a trip to the liquor store to get a nice brandy for next time.

Adventure In Food: Author: Kerry Howell

Friday, March 26, 2010

Traveling – Radovljica – Slovenia

On a day trip out from take Bled Slovenia (during the fall 2007 Europe trip), we drove to the small town of Radovljica. We were attracted to this town by Rick Steves travel video on Slovenia where he visited the local Bee Museum.

It took us about an hour to get from our hotel in Lake Bled to the town of Radovljica. We quickly found a place to park and walked the pedestrian only street to the Bee museum. This museum is quite fascinating because Slovenia has domesticated and exported bees around the world for hundreds of years.

Displays in the museum showed the local uses of honey, bees wax, and the bee boxes (hives) that have uniquely painted fronts. The painted fronts are so the bees can find their way to their unique home, and some of the paintings are quite entertaining such as a devil sharpening a woman’s tongue on a grinding wheel.

After the Bee museum, we visited the nearby House Lectar that includes a hotel, restaurant, and in the cellar a ginger cookie company. Many of the ginger cookies were heart shaped with message written in frosting like those we saw in Munich. They also make custom shapes for companies to use in advertising; cars, horseshoes, etc. This was a very interesting place to visit and chat with the people.

Our next stop was at a small restaurant to get some fortification in the form of a pastry. We chose a dessert called sachre torte. It is a chocolate cake with whipped cream, but we were very disappointed that it was very dry and without much in the way of flavor. We are always disappointed when the tastes or textures of a dessert do not live up to our expectations based on how the dessert looks!

The town was definitely off the beaten tourist path, yet it was beautiful to tour and made for a very nice walk. When traveling, we always try to find a small unique item from the areas we visit to use on our Christmas tree to allow us to remember the places we have visited. In this town, we picked up some intricately shaped bee wax Christmas ornaments and a small heart shaped ginger cookie. Whenever we see these ornaments, we instantly remember the wonderful time we had in the town of Radovljica.

Adventure In Food: Author: Kerry Howell

Thursday, March 25, 2010

Cinnamon French Toast

What do you do with leftover whipped cream and a loaf of cinnamon twist bread?  Why make French toast of course!

While visiting our friends in Bend, I decided to make French toast with the loaf of cinnamon bread that we had picked up at a bakery during our trip.  When I went to the refrigerator to get the eggs, I saw the 1 1/2-cups of whipped cream that was left over from making the Lake Bled Cream Cake, and thought it would make a nice dairy medium for the eggs.

I grabbed the container of whipped cream, four eggs and set to work whisking them all together in a large bowl.  I would normally add a little vanilla extract into the batter (a lesson I learned from my friend David), but the whipped cream already had vanilla and sugar added from when it was whipped.  The next step I performed was to cut the cinnamon bread into 1/2-inch slices.

I found a large Teflon griddle and prepared to cook.  The first piece of bread that I dipped into the batter came out with a very frothy coating of egg/whipped cream mixture, it cooked just fine, but looked a little strange.  When I dipped the remainder of the pieces, they looked more traditional in their coating and the way they cooked.

This French toast cooked like any other French toast.  It had a creamer texture in the coating and the cinnamon from the bread mixed with the vanilla in the whipped cream provided a nice blend of flavors.

It was very easy to mix and cook and went well with the small pork sausages that our friend Dinah prepared.  The six of us enjoyed a wonderful breakfast.

Adventures In Food: Author: Kerry Howell

Wednesday, March 24, 2010

Lake Bled Cream Cake

I mentioned in several of my previous blog posts about the Lake Bled Cream Cake (Kremsnita) we ate in Slovenia.  Recently I decided to see if I could find a recipe to make this great dessert.  I searched the internet and decided to try the recipe that sounded the most authentic.

As we prepared to spend the weekend at our friends in Bend, I made sure that I gathered all the necessary items to make the cake.  The hardest thing to find was the pyloh dough used for the top and bottom crust.  I looked at three stores until I found Organic Fillo Dough at a New Season market.

The recipe has three components: crust, vanilla cream filling, and whipped cream filling.  The bottom crust is a single section that fits into the bottom of the serving dish (in this case a 9 x 13 inch Pyrex glass cooking pan) and the top crust is pre-cut into individual serving sizes to prevent it from shattering when cutting for serving.


I started by setting the oven to 375 degrees and then finding a cookie sheet, in this case an air bake pan.  I gave the cookie sheet a light coating of cooking spray.  Next, I calculated the size of the serving dish (one-half a sheet of pyloh dough) and then stacked eight sheets of pyloh dough, brushing each sheet with melted butter before laying on the next sheet.  Once I had built the stack, I trimmed the excess so it would fit into the bottom of the serving pan.  I cooked the crust for ten minutes until it was a light golden brown.  Once the bottom crust was cool, I placed it into the serving dish.

Next, I started working on the cooked vanilla cream filling:
  • 1-cup sugar
  • 4-tablespoons cornstarch
  • 1/4-teaspoon salt
  • 4-cups of milk
  • 4-egg yolks, beaten
  • 4-tablespoons butter
  • 4-teaspoons vanilla
I had the sugar, cornstarch, and salt already measured and stored in a plastic Ziploc bag, so I added the contents into a large saucepan and then added the four cups of milk and four egg yolks.  I cooked over medium heat while constantly stirring until the mixture thickened and boiled for one minute.  Once it has boiled for the minute, I removed the saucepan from the heat, added the butter and vanilla, and stirred until they were fully integrated into the mixture.

I had prepared a large bowl filled with ice water and I placed the saucepan into the bowl of water to cool the vanilla filling.

While the oven was still hot, I prepared the top crust.  It is constructed almost the same as the bottom crust, except I stacked ten sheets of the pyloh dough (brushed with the melted butter between each layer), then cut the final stack into individual rectangles (2 x 2.5 inches) that will be the final serving sizes.  I separated the pieces on the cookie sheet so they didn’t touch each other, and then baked for ten minutes.

The vanilla filling was now cool, so I spread it evenly over the bottom crust in the serving pan and covered the pan with foil and placed it in the refrigerator for an hour to chill.

When everything was cool, I started on the whipped cream filling:
  • 1-quart whipping cream
  • 1/2-cup sugar
  • 1-teaspoon vanilla
I placed it all in a large bowl and started mixing with a hand mixer.  The directions say to mix until it is thick, fluffy and stands in firm peaks.  This is what we did, but we later realized it needed to be whipped until it is very firm!

I spread the whipped cream over the layer of vanilla cream until it was level with the top of the serving pan (this left about one and a half cups of leftover whipped cream).  I placed the individual squares of crust on top of the whipped cream layer; it looks great!  I covered the dessert with the aluminum foil and placed it back in the refrigerator to chill until after dinner.  I should have dusted the top crust with powdered sugar, but we didn’t have any that I could find, so we went on with out the “snow” dusting.

When I served the pieces by cutting around the individual crust rectangles, I was disappointed that the whipped cream oozed out the sides of the pieces because it was too soft.  I next time I will whip it longer or I might even try adding some gelatin to make sure the whipped cream filling is firm and will not spread.

The dessert tasted delicious, and everyone really enjoyed it.  The whipped cream nicely balances the full flavor of the vanilla cream and the crust adds a nice crunch.  Next time I will make sure that the depth of the whipped cream matches the depth of the vanilla cream for visually aesthetics.

This is an easy dessert to make, and it works best if it is prepared ahead of time.  I do recommend only making this dessert when there are plenty of people to eat it to reduce the risk of eating too much.

Adventures In Food: Author: Kerry Howell

Products of Lake Bled, Slovenia

Tuesday, March 23, 2010

Traveling – Lake Bled, Slovenia

We arrived late in the afternoon in Lake Bled, Slovenia, and we were very tired from a full day of driving and sightseeing.  We are nine days into our Fall 2007 Europe trip and we have been on active and on the move everyday.  We were instantly revived when we saw the lake and the beauty of the surrounding area.

Our first task was to find a place to stay.  We were using travel materials from Rick Steves that included a listing of budget accommodations.  The first Bed and Breakfast we checked out was about 10 miles from the lake and no one was home.  We couldn’t find the second place, so we chose a wonderful hotel: Villa Anna that is situated at the top of the hill on the main road leading to the lake.  It was a great spot as we had a suite complete with kitchen, sitting room, and a sun room where we had our breakfasts and dried our cloths after washing.  The native language in Slovenia is English, so it is very easy to communicate with people when looking for lodging and restaurants.

It’s a five-minute walk from our hotel to the lake.  We walked down and looked out over the pristine lake and noted the church situated on top of a small island in the lake.  We found a small restaurant right on the lake and had a nice dinner.  We both had a pork chop cooked with mushroom sauce, salad, vegetables, and the famous Lake Bled Cream Cake!

We enjoyed the Bled Cream Cake after every dinner while we stayed at the lake.  It has a crunchy top and bottom, and two layers in the middle; yellow vanilla custard and whipped cream.  It ranks as one of our top desserts of all time!

The day after arriving, we went for a drive over the Julian Alps.  The road makes 50 switchbacks during the mountain crossing and was quite a beautiful drive.  Once we reached the other side, there are three options to get back to the hotel; drive back over the mountain (4 hours), drive around the mountains (5 hours), or take the train back through the mountains.  We chose the third options of taking the train.

We thought that we would load our car on the train and get in a passenger rail car for the ride.  We were in a passenger car all right – our car!  I drove our car onto the flatbed train car and remained in our car for the hour long ride through the mountains.  We got out some cheese, crackers and fruit and ate a snack while watching the scenery go by.

When we returned to Lake Bled, we visited our favorite restaurant on the lake, but it was too late for patio service so we dined inside.  I had deer medallions and my wife had marinated chicken kabobs, and yes, we finished with Bled Cream Cake.

We really enjoyed our visit to the church on the island.  We had a gondolier that rowed us to the island where we had 30 minutes to look around.  We climbed the stairs from the lake to the church courtyard and then we flew through the church and small museum as the clock was ticking.  The best part about the visit to the island was the slow boat ride where we could lazily watch the scenery.

On the same day we visited the island, we visited the castle on the hill that overlooks the town and lake.

Our favorite memories (other than dessert), was from our visit to the Vintgar George.  This is a small canyon with a beautiful turquoise river that runs down between the narrow canyon walls.  There are walkways built out over the river so you can walk the length of the valley (about 2 miles down and back).  We were visiting in October, so the colors of the trees were very vibrant and contrasted wonderfully with the color of the river.

Lake Bled is a warm friendly place to relax or enjoy the outdoors.  We relaxed, explored, and really enjoyed our adventures experiencing the local foods.

Adventures In Food: Author: Kerry Howell