Help me by sharing this blog with your friends and by generating some income for me by clicking through on my sponsor's Google ads. Thank you!

Search This Blog

Wednesday, July 28, 2010

Tostones (Puerto Rican Fried Plantains)

A few nights ago, my wife and I went to our niece’s house an evening that included dinner and playing some board games. Because our niece was hosting, she provided the dinner and we brought a green salad and the game: Ticket to Ride - Europe.


When we arrived, our niece plied us with some assorted green olives for appetizer while she finished the dinner. She quickly applied a homemade jerk rub to the talapia fillets and placed them in the oven to bake. Next, she surprised us by making Tostones as side dish to accompany the fish.

Even though we took a trip to Puerto Rico in 2003, we had never experienced Tostones. The recipe is very easy to make. She started with four green Plantains and cut them on the diagonal into one-inch thick pieces. Next, she fried the pieces in about 1/2-cup of oil until each side was lightly browned.

She removed the pieces from the pan and placed them to drain on some paper towel. The next step was highly technical: one at a time, she placed the cooked piece on a small saucer and smashed it flat with a drinking glass. With all the pieces flattened, she put them back in the oil for a second cooking. Once the pieces cooked to a nice golden brown, she removed them from the oil to drain and sprinkled on some sea salt for flavoring.

Unlike green Banana’s, green plantains are treated like a starch instead of a sugar. The first cooking softens the pieces so they can be smashed. The second cooking is like frying a piece of potato to make French fries: it cooks the piece through and browns the starch.

I checked a recipe on-line and it suggested dipping the pieces in water between the first and second frying. Don’t do that, water and hot oil do not mix! One person wrote that when she lived in Puerto Rico, her family would soak the pieces in salt water between frying to preserve the pieces while making a complicated meal. That allowed the initial frying to be completed before the main meal activities, then just before serving, they would drain the water and blot the pieces before the second frying.

Our niece had purchased some Jufran Banana Sauce for dipping the Tostone pieces with dinner. This sauce is like a sweet catsup with a slightly runnier consistency.

We had a great meal with the jerked tilapia, green salad, and Tostones. The fish was cooked to perfection, but the real hit were the Tostones. They were like eating a piece of fried potato, but lighter to the taste and the sauce was a nice addition without being too sweet or overloading the flavor of the Tostones.

Ticket to Ride EuropeAfter dinner we played several games of Ticket to Ride – Europe, a little dessert, and then our niece taught us a new card game which we enjoyed playing several hands.

Desert was a piece of white cake (cooked in a bunt pan) with a homemade blueberry sauce and vanilla ice cream. This dessert was very good and it was hard to not lick the plate when I finished (after all, we were with family).

We enjoyed our evening of dinner and games. It was fun to experience a new dish we typically would not try to cook ourselves. I look forward to the next game night, and seeing how our niece will surprise us with another new recipe.

Adventures In Food: Author: Kerry Howell

Monday, July 26, 2010

Trader Joe’s Meatless Corn Dogs

My wife and I had to make a quick overnight trip to Seattle last week and we were both very tired when we returned home.  I looked in the refrigerator and freezer for something quick to make and found a box of Trader Joe’s Meatless Corn Dogs.  My wife enjoys occasionally eating a corn dog, but not caring what goes into some hot dogs (Moo, Oink, Squeak), we prefer a vegetarian product.  We used to purchase Morningstar meatless corn dogs, until the parent company Kellogg’s removed them from the market several years ago.


About a month ago, we purchased the box of four Trader Joe’s corn dogs and when we got home, I placed the box in the freezer until sometime when we wanted a quick meal.  This was the time for a quick meal, so I removed the four corn dogs from the box and placed them on a microwavable plate.  Following the directions, I microwaved the corn dogs for four minutes, turning them after two minutes.

I served our corn dogs with some basic yellow mustard.  The corn dogs had a nice texture and the meatless “hot dog” inside made from soy, had a nice firm consistency, and looked just like a true hot dog.  We were a disappointed in the corn breading, because it was very dry.  It was almost necessary to have a glass of water close by to wash down the breading.  Even with the addition of the mustard, both my wife and I agreed that because they were so dry, we probably would not purchase these corn dogs again.

We will continue to look for the perfect meatless corn dog for nights when we want a very quick meal.  We also join with the many other disappointed consumers in requesting that Morningstar/Kellogg’s solve their supplier issues and reintroduce their line of tasty meatless corn dogs.

Adventures In Food: Author: Kerry Howell


Enhanced by Zemanta

Friday, July 23, 2010

Bratwurst and Onions

When I am busy working on a project, I always look for a relative easy dinner to fix.  For this dinner, I had several fresh bratwurst sausages I picked up a few days before at our local store and 1/2 an onion remaining from making Bonnie’s Baked Beans.

I started outside by lighting the briquettes in our barbeque, then went inside and started boiling about four cups of water in a medium sized saucepan.  If I had some inexpensive beer, I would have used several cans instead of the water, but I had to use what was available.  I added the bratwurst to the boiling water and let them simmer covered for fifteen minutes.

I sliced the onions and tossed them with a small amount of Grape seed oil to keep them moist and prevent burning.  With the brats cooking and the onions ready, I went outside and found my barbeque grilling pan and gave it a good cleaning then put the oiled onions in the pan.  Everything was ready, so I cleaned the grill on the barbeque, added the grilling pan, put the brats on the grill, and closed the lid.

About this time, my wife returned from a friend’s house and she brought back a sweet onion.  Because there were two of us and ½ a smaller onion doesn’t go very far, I quickly sliced the new onion and added to the other onions already cooking in the barbeque.  I turned the brats about every five minutes while cooking for fifteen minutes.

A little Original Deli style Monastery Mustard for the brats, some raw carrots, and we were ready to eat.  We enjoyed our dinner of grilled bratwurst with sautéed onions from the grill.  The meal didn’t take much in the way of preparation or attention while cooking, which allowed me to complete my other project while cooking.  Sometimes it’s nice to have a simple, quick and tasty meal that allows you the time to do more pressing activities than cooking.

Adventures In Food: Author: Kerry Howell


Enhanced by Zemanta

Monday, July 19, 2010

Paula Deen’s Hash Brown Casserole

Wow, I went for two days without posting a new blog article - we had a busy weekend. Our son and his wife came to stay with us for two days because they were attending a wedding. Saturday, my wife’s family had a gathering so we attended that and I took Bonnie’s Baked Beans and Sunshine Cake, both were a huge success. On Sunday, I decided to make the Paula Deen Hash Brown Casserole. I watched her TV program when she made it and I thought it looked good, so I printed the recipe and waiting until we had some company to make it.


I made the casserole and about the time I took it out of the oven, I noticed a pain in my left lower back that was getting worse. I remembered the downside to potluck family dinners, is you never quite know how someone else handles their food. I let our family eat while I went a laid down to see if the pain would subside. No such luck, I had several bouts of nausea, but none of the other effects of food poisoning. A quick check of the internet showed the appendix on the right side, so that’s not the problem. After suffering with this for 12 hours, my wife convinced me to go to the ER at 9:30 pm to see if I had a kidney stone. After three hours and pokes, prods, and a CT scan, the results came back that outside of a slightly inflamed kidney, all the tests were normal. The doctor thought I might have a pulled muscle, but to take Tylenol, which has eliminated the pain. However, I lost a full day while lying in bed trying to get comfortable and sleeping.

I confirmed my decision to make this recipe for breakfast when I got up Sunday morning and everyone else was asleep (they had a late night). I had already thawed my one pound of Jimmy Dean Maple Sausage and rummaged around in the freezer to find a loaf of buttermilk bread.


I started by melting the butter in a large skillet while I chopped one-half a white onion. I sautéed the onion while I trimmed the crusts off the slices of bread, this was very easy because the slices were still frozen. Into another skillet, I browned the bulk sausage, realizing after I put the sausage in the pan, the skillet was almost too small so I had to be careful while turning the sausage to keep if from flying out.

Once the onions were cooked, I added the half package of frozen hash browns to the skillet with the onions and cooked the hash browns for about five minutes. I had to switch from a rubber spatula to one made of metal so I could loosen the browning potatoes from the bottom of the stainless steel skillet. Once the potatoes were cooked, I spread them in the bottom of my prepared 9x13 inch glass-baking pan.

On top of the potatoes, I spread the bread cubes over the potatoes and the sausage over the bread cubes. I quickly mixed the egg and 2% milk with the salt, pepper, nutmeg, and mustard. I poured the egg mixture over the top of the three layers in the baking pan trying to coat all the bread cubes. I shredded the parmesan and cheddar cheeses and spread them over the casserole then put in the oven at 350 degrees for 45 minutes.

By now everyone else in the house was up and ready to eat. When the casserole finished cooking, I took removed it from the oven, set it on top of the stove, and told everyone to dig in, and then I left to deal with my back pain.

I still have not tasted the casserole because the thought of it makes me feel a little nauseous. Everyone who ate the casserole really like the flavors, taste and texture, though it is very rich. Fortunately, my wife has agreed to freeze the remainder because I am not sure I could look at it right now. I do look forward to tasting it in the future, and it seems to be a hit when you have a group people for breakfast.

Find the recipe here: http://www.foodnetwork.com/recipes/paulas-home-cooking/hash-brown-casserole-recipe/index.html

Adventures In Food: Author: Kerry Howell

Friday, July 16, 2010

Bonnie’s Baked Beans

In 1978, my girl friend (now my wife) and I accompanied my parents to stay the Trinity Mountains of California at my uncle’s property for a week.  Several of my uncles have spent part of their summers improving this property and have made a comfortable summer get-away location.  When we visited, the site was still a little primitive (we slept in a large shipping container), but it was a nice place to enjoy the wildlife (rattlesnakes and deer), or go to the Trinity River and try panning for gold.


For one of the dinners, my aunt Bonnie made baked beans.  We were very impressed an decide these were the best baked beans we had ever eaten.  Before we left for home, we asked my aunt for the recipe because we were going to go home and make the recipe.  Now 32 years later, we had not yet made the recipe.  This weekend we are attending a family gathering and we were asked to bring a side dish to the potluck.  We thought this would be a great time to make the baked beans, so my wife found the recipe and gave it to me to make.

Bonnie’s Baked Beans
Ingredients:
   1 ½ pounds of ground beef
   ¾ pound of bacon
   1 cup onion, chopped
   2 cans pork and beans, (1 pound, 15 ounce, or so)
   1 can kidney beans, drained
   1 can butter beans, drained
   1 cup Catsup
   1-tablespoon brown sugar
   1-tablespoon liquid smoke
   3-tablespoons white vinegar
   1-tablespoon salt
   Dash of pepper

Brown the ground beef, drain, and put in crock-pot.  Brown bacon and onion, drain and add to crock-pot.  Add remaining ingredients and stir.  Cook on low 4 to 9 hours.

I took a shopping trip to get the ground beef, bacon, and a couple large cans of original flavored Bush Beans.  We normally do not eat ground beef because years ago we just missed getting some of the hamburger tainted with Mad Cow disease, now we are better safe than sorry, and this is why we often use buffalo instead of beef.  As ground buffalo does not have much flavor, I went ahead and purchased ground beef from a store that only offers naturally raised beef.

Following the directions in the recipe, I browned the beef and added it to the crock-pot, then browned the bacon in two batches.  As the bacon comes in 1-pound packages and the recipe calls for ¾ pound, I used some of the bacon to make a BLT sandwich for my lunch.  I browned the onions then added the onions and bacon to the crock-pot.  Next, I opened the cans of beans and added them to the crock-pot as well as the remainder of the ingredients.  I stirred everything together until it was mixed and set the crock pot on low setting to cook for 8 hours.  Occasional I would go to the kitchen to stir the beans and sample a small amount to make sure they were edible.

Once the beans finished baking, I transferred the contents of the crock-pot to a large metal bowl to cool.  We were surprised to see that there was an area in the crock-pot where the beans had burned to the side of the crock.  Fortunately, it was just a small area and the burning didn’t affect the flavor of the rest of the beans.

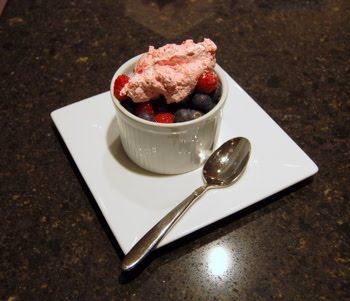
My wife and I had a small ramekin of the hot beans with our dinners last night (we had to make sure they were ok to serve to others), and we really enjoyed the richness of the flavors.  The ground beef added some body to the beans and the seasonings added a nice tangy taste.

Now that I have finally made this baked bean recipe, I will make it again.  Next time, I will only bake the beans in the crock-pot for about 6 hours to make sure that I don’t get the burning I experienced this time.  This recipe makes a large amount of baked bean, so next time I make the recipe; I will probably freeze some of the finished baked beans to use later.  All I can say is that 32 years after we first tried them, these are still the best baked beans that I have ever eaten.

Adventures In Food: Author: Kerry Howell

Thursday, July 15, 2010

Quick Artichoke Salad

Now that summer is here with very hot days, I didn’t want to heat up the house by using the oven and at 90 degrees, it is too hot to be outside grilling dinner.  I went to my stack of recipes to try that I print after watching programs on the Food Network, and I found the recipe for Quick Artichoke Salad by Sunny Anderson.


I already had all the ingredients in the pantry and I could see the only item to heat would be the boiling water for the bowtie pasta.  I gathered all the ingredients and started to work.  The recipe calls for ½ pound of the bowtie pasta, and the bag that I had contained a full pound, so I went ahead and cooked the contents of the entire bag.  Because I was using twice the pasta, I doubled the remainder of the recipe.  While the pasta boiled, I sliced a full can of black olives, chopped a small red onion (the onion I didn’t double), 8 sun dried tomatoes (I used dry tomatoes, not the ones soaked in oil).  I used the remainder (about half) of a supersized jar of artichoke hearts, making sure all the pieces were quartered.

Once I prepared each ingredient, I dumped it in a large mixing bowl.  When the bowtie pasta were cooked, I drained the water from the pan and added the pasta to the rest of the ingredients in the bowl.  I added twice as much of the lemon juice, red wine vinegar, and olive oil on top of the rest of the ingredients and stirred to mix.  I covered the salad with plastic wrap and put it in the refrigerator to cool and for the flavors to mingle for about thirty minutes until we were ready to eat.

While the salad cooled, I sautéed a chicken breast in the liquid left over from the jar of artichoke hearts.  At dinner time, I served the salad and found that I should have used a large spoon to mix the salad instead of the large fork, because the onion and garlic were still at the bottom of the bowl.  Fortunately, when I served the salad, I used a large spoon and mixed everything together to get a good distribution of ingredients.  We had a great dinner of the sautéed chicken breast and artichoke salad.  We were surprised at how much of the dressing the pasta absorbed and I ended up adding even more lemon juice, red wine vinegar and olive oil to the remaining salad.

The artichoke salad was very sweet tasting: possibly due to the red wine vinegar.  My wife had some feedback for me on the salad.  She really liked the taste and ingredients, but she would like more dressing, some additional color interest like raw broccoli and maybe some julienned Italian salami.  I realized when I was writing about making this recipe, that I forgot to add the chopped parsley leaves, which would have added some nice color to the salad.

Neither one of us liked the chopped onion pieces, because the pieces were small and tended to sift to the bottom of the bowl.  My wife suggested using quartered strips of the red onion that would stay suspended in the pasta, unlike the small chunks.

I am keeping this recipe to use again, possibly when we need to take a cold salad to a picnic or a party.  I will add some other ingredients like the salami, broccoli, green olives, carrot and whatever else I find in the refrigerator.  Hmmm, I should have added some of the fennel bulb and stalk.  Oh well, next time.


Find the recipe here:  http://www.foodnetwork.com/recipes/sunny-anderson/quick-artichoke-salad-recipe/index.html

Adventures In Food: Author: Kerry Howell

Wednesday, July 14, 2010

Cheryl’s Fresh Berry Surprise

A few days ago, my wife asked if I would like to have some berries for dessert. I was in the other room and I said that some cool berries sounded good. When she returned, I was quite surprised to see what she brought, and that is how we came up with the name.


Recently I made the Lemonade Pie recipe, and as a result, I had a large container of raspberry sauce left over. For several nights, I used a spoonful of the raspberry sauce with vanilla ice cream and enjoyed the raspberry flavor with the vanilla.

For my surprise, my wife washed about a cup each of fresh raspberries and blueberries, drained them, and split the berries into two serving dishes. Next, my wife took the remainder of the raspberry sauce (about two tablespoons) and mixed it with about a cup of Cool Whip whipped topping. She applied the resulting topping to the top of the berries and served.

We enjoyed the treat of fresh berries with the creamy raspberry topping. The vanilla flavor of the Cool Whip extended the raspberry sauce and gave it a smooth texture, which made a surprisingly flavorful topping. The only problem now, is that we are out of the raspberry sauce, so now I will have to make some more sauce.

Find the recipe for the raspberry sauce here: http://adventuresinfood123.blogspot.com/2010/07/lemonade-pie.html?utm_source=feedburner&utm_medium=feed&utm_campaign=Feed%3A+http%2Fadventuresinfood123blogspotcom+%28Adventures+In+Food%29

Adventures In Food: Author: Kerry Howell

Tuesday, July 13, 2010

Tropical Blueberry Smoothie

One of the recipes I picked up at our Saturday Market from the Oregon Farm Direct Nutrition Program: Women, Infants, and Children (WIC) is for a Tropical Blueberry Smoothie provided by the Dole Food Company.  As we are now in the fresh blueberry season, I decided that making smoothies would be a great dessert after dinner.

The recipe is very easy:
   1 can (8 ounces) crushed pineapple (drained)
   1 ripe banana
   1-cup milk
   1-cup fresh blueberries

Put all the ingredients in the blender and blend until thick and smooth.  As we were having another warm evening, I also threw in a few pieces of ice to make sure the smoothie was very cold and frothy.  This recipe made enough to fill two large glasses so both my wife and I enjoyed a glass.  When we drank the blueberry smoothie, we could taste the three fruit flavors and enjoyed the thick and frosty consistency. 

This is an easy recipe to make on a warm evening that highlights the fresh taste found in summer blueberries.

Adventures In Food: Author: Kerry Howell

Monday, July 12, 2010

Sautéed Chicken Breast with Whole Grain Mustard and Sage

I found this recipe on the Food Network web site in May while looking for recipes that use chicken breasts. The recipe had a five star average rating, so I printed the recipe and added it to my stack of recipes to make in the future.


Yesterday I pulled several recipes to make for meals this week and the Sautéed Chicken Breast with Whole Grain Mustard and Sage came to the top. I am glad that I chose a recipe that didn’t require too much preparation time because we were out running errands for most of the afternoon, and after a brief stop at the store to pick up a few items, it was already early evening and I didn’t want to eat too late.

I decided to use our large stainless squared sided skillet for cooking the chicken to help reduce the splattering on the stovetop. While the skillet heated over medium heat, I got out the chicken breasts, sprinkled on salt and pepper, and then dredged them through some all-purpose flour. I have learned that when dredging meat in flour, it is best to shake off the extra flour so that it doesn’t get gooey (this is an instance when less is more). Once the skillet was hot, I added about a tablespoon of grape seed oil to heat. I placed two chicken breasts in the pan to cook and put the last piece of raw chicken in the refrigerator, as three breasts in the pan would have been too crowded.

I used skinless chicken breasts so I let them cook on one side for four minutes. Part way through the four minutes, my wife came in and asked me to turn the fan on full as the smell from frying the chicken was spreading in the house. I said that I am sautéing the chicken; see it says so in the title of the recipe. Oh, wait, hot pan, hot oil, add meat, she was correct that this is frying. I turned the pieces of chicken over and cooked them for another seven minutes.

Once the chicken breasts were cooked, I removed them from the pan, placed them on a plate, and covered them with foil to keep warm. I started the sauce by adding ½ cup of white wine to the skillet and stirring with a spatula to deglaze the pan. I had to turn up the heat to medium high and I cooked the wine until it thickened. To the wine, I added the 1 ½ cups of chicken broth, eight fresh sage leaves and let the mixture cook for about six minutes until the sauce reduced by about ¼. I removed the skillet from the heat and whisked in two tablespoons of margarine and 1 ½ tablespoons of Deli Original style Monastery Mustard. I tried using my spatula to integrate these two items into the hot sauce, but it just wasn’t working, so I used the whisk as specified in the recipe (I dislike dirtying more utensils than necessary).

I cut the chicken breasts in half (to make sure they were completely cooked), served each half breast with brown rice, topped with about ¼ cup of the sauce. We enjoyed the dinner though the mustard was a little spicy and next time I may only use one tablespoon, but it was still good. The sage leaves in the sauce added a subtle flavor and made a nice garnish on the rice.

I was unsure if I would make this recipe again until we ate the remainder for our lunch. The chicken was quite flavorful after soaking in the remaining sauce overnight and though the sauce was still a little on the spicy side, it made a very enjoyable entrée for our lunch and my wife asked me to keep the recipe in our meal rotation.

Find the recipe here: http://www.foodnetwork.com/recipes/food-network-kitchens/sauteed-chicken-breast-with-whole-grain-mustard-and-sage-recipe2/index.html

Adventures In Food: Author: Kerry Howell

Sunday, July 11, 2010

Pulled Pork Rollups

After cooking the Easy Roasted Pork Shoulder, I was left with a very large bowl of shredded pork, which I distributed, into multiple bags that I sealed and froze.  Now that these bags of pork are in the freezer, what do I do with them?  With the help of my wife and a friend, we recently came up with one answer to that question.


In a previous blog entry, I mentioned how my wife and I traveled to Corvallis Oregon to stay with a friend.  For dinner that night, we volunteered to bring a bag of the thawed shredded pork for dinner.  When we arrived we decided to and make pork rollups (soft tacos).

Ingredients:
   2-cups pulled pork
   1-package tortilla shells (we used six-inch gluten-free rice tortillas)
   1-cup prepared guacamole
   1-cup salsa
   1-cup sour cream
   1-cup grated cheese (Tillamook extra sharp cheddar is excellent)
   8-miniature sweet peppers, sliced
   4-cups lettuce
   3-green onions, sliced

We started by washing all the vegetables, and then tearing the lettuce into smaller pieces and slicing the onions and peppers.  Next, we grated the cheese and heated the pork in the microwave.

The next step is easy, lay one of the tortilla shells on a plate (optionally warm the tortilla), and layer the ingredients on the tortilla.  Once the desired mix of ingredients are added, the tortilla can be rolled for eating by hand or left flat for more refined eating with a fork.  The biggest problem that I encounter when preparing my rollups is that I use too much of each ingredient, which makes it difficult to roll the tortilla and keep all the contents inside.  I guess the answer would be to use a larger diameter tortilla, but then I would just add additional ingredients inside and be back where I started.

We enjoyed our dinner with the pulled pork rollups.  It is refreshing to have the crunch of the peppers to contrast with the other soft ingredients and add some body to the meal.  The nice thing about this meal is each diner can make their own rollup with their own set of ingredients.  This is also a summer great meal (when it is 90+ degrees outside), the rollups can be made without using the stove or oven.  I thought it was a great time to try a new recipe with the frozen pork.  One package of shredded pork used, and three frozen packages to go.

Adventures In Food: Author: Kerry Howell

Saturday, July 10, 2010

Saturday Market

Today I took an early trip to the Hillsboro Saturday Farmers Market with the goal of watching the Chef Live demonstration, getting some berries, and a bunch of cut flowers for our house.  We had a visitor coming to our house at 10 am and it was necessary that be back by that time, so I arrived at the market around 9 am.


I walked the length of the market reviewing the offering of fresh berries and their mentally noting the prices.  I looked at the pre-made bouquets offered at the four different flower stalls checking out the colors and types of flowers available.  As I walked to the area where the Chef Live demonstrations take place, I met Ellen that performs the Chef Live demonstrations.  She noted that I was very early today, and that she was just heading out to gather the ingredients for her demonstration of making fruit salad in seconds.  Ok, scratch my first goal of seeing the Chef Live demonstration.


I walked back through the market to pick a bouquet of flowers.  After considering all of the options, I chose a vendor where we have purchased flowers in the past because she offers hardy flowers in a wide variety of colors.  The woman who operates the stand was also kind enough to let me come in to her stand and get down on my hands and knees to take some of my favorite type of photography: close-up photos of flowers.  I am glad that wore shorts to the market, as once I finished taking my photos, I just quickly wiped the flower stems and petals from my knees and I was off to continue my shopping.

With my bunch of flowers in hand, I was headed to purchase some berries, but I was sidetracked by the stand where we occasionally purchase fresh Oregon cherries.  I tried a sample cherry and found it to be very sweet and plump.  Now I headed to my car with a handful of flowers and two pounds of cherries.

Once I dropped off my load, I headed back to the market to pick up a flat of berries.  As raspberry season is just about over, I decided to pick up ½ flat of raspberries and ½ flat of blueberries.  That should hold us over until next week.

I see on the Chef Live blog site that there will not be a demonstration next week, but the last Saturday of the month, Ellen will demonstrate Super Veggie Wrap, so I plan on stopping by and sampling the wraps.

In the end, I was very satisfied with what I accomplished at the market.  I purchased flowers, cherries, raspberries, and blueberries.  I took some excellent photographs of the flowers, but I missed seeing the Chef Live demonstration.  I did make it home in time to store all my purchases and to be ready for the meeting.  I have learned that the best selection of fresh produce is available earlier in morning when the market opens, but to see some of the demonstrations, plan to arrive after 10 am.  Now I must wrap up my writing for today because I have quite a few blueberries to freeze.

Adventures In Food: Author: Kerry Howell