Help me by sharing this blog with your friends and by generating some income for me by clicking through on my sponsor's Google ads. Thank you!

Search This Blog

Showing posts with label Chocolate. Show all posts

Friday, December 17, 2010

Peanut Butter Cup Cookies

I enjoy making Peanut Butter Cup cookies for two reasons: they are easy to make and they contain chocolate peanut butter cups.  The first thing I do when preparing to bake this recipe is to sit in front of the TV and unwrap two small packages  of peanut butter cups(one milk chocolate and the other dark chocolate).  This unwrapping process includes watching a Christmas program and nibbling on a few of the peanut butter cups while trying to keep the little extra pieces of chocolate from getting all over the living room.


With my peanut butter cups unwrapped, it’s time to make the cookies.  Because there are only three steps to the directions, the recipe very easy to make.  I start by creaming the butter with the sugar.  Using my adjustable measuring cup, I measured out the ½ cup of peanut butter (Crunchy Jiff).  I really like the adjustable measuring cup when I measure a sticky substance like peanut butter, molasses and corn syrup, because once you fill the measuring area, you push the plunger and then just scrape off the ingredient.  There is no using a spatula (or your finger) and trying to get the all the sticky ingredient out of the measuring cup.

Once I creamed the sugars, I added the egg, vanilla, and milk and mixed, then I added the flour.  The directions call to shape the dough into 40 small balls.  If you try, you will quickly find the dough is very gummy and when you try to form the balls, you will just end up with a mess.  To solve the problem you can either spoon about a teaspoon of dough into the mini muffin pan (that’s what I did this time), or chill the dough for about an hour, and then you can form the dough into balls.


Once the pan of cookies has finished baking, I removed the pan from the oven and quickly pressed a peanut butter cup into the center of one of the cookies.  I usually fill two or three cookies, and then I use a fork and remove the cookies from the muffin pan.  I have found that if you wait too long to remove the cookies, the peanut butter cup gets very soft from the heat of the cookie and will deform when you take it out of the pan.  You could wait for everything to cool before removing the cookies, but that would take about an hour for the peanut butter cups to cool.  If you want to make another batch of cookies right away, then remove the cookies just after you press the peanut butter cup into the center.

The last time I made this recipe, I ended up with about fifty finished cookies.  Once they were completely cool, I placed them in a Ziploc bag and popped them into the freezer.  When our family comes for Christmas, I will remove the cookies from the freezer about thirty minutes before serving and they will be just as fresh as the day I made them.

Find the recipe at: http://allrecipes.com//Recipe/peanut-butter-cup-cookies/Detail.aspx

Adventures In Food: Author: Kerry Howell

Monday, July 5, 2010

Papa Murphy’s Chocolate Chip Cookie Dough

One of the fun aspects about the Hillsboro July 4th parade, is that most of the parade entries toss candy or other goodies to the crowd.  Small children usually sit in the front row so they can get easily get the hard candies tossed out to the crowd.  I was with some of the other men in our group standing about ten feet back from the curb.  We would occasionally get a few candies tossed our way (Mmm, root beer barrels) or other interesting items.  One member of our group caught a small bag of baby carrots thrown from a vehicle representing our local hospital; we must be getting old as we enjoyed the carrots more than the candy.


A small van representing Reser’s Fine Foods passed, but they missed tossing their sample pepperoni sticks to our group.  Though a little while later, I managed to get one of the best items handed out at the parade.  It was a coupon for Papa Murphy’s on either $3 off any size take ‘n’ bake pizza, or a free container of their take ‘n’ bake chocolate chip cookie dough.  I thought it would make a great product to test and see how their cookies compare to the Alton Brown chocolate chip cookie recipe.

My wife and I went by and picked up the container of cookie dough from our local Papa Murphy’s store.  It is a pint container with 16 ounces of cookie dough.  The first thing I did was to turn on the oven to 375 degrees, get out two cookie sheets and started scooping out roughly 1/2 tablespoon sized portions.  The next thing was to read the list of ingredients on the package: for such a simple product (a cookie), there are a lot of added items (salt, mono and diglycerides, calcium disodium EDTA, colored with Annatto, artificial flavor, etc).

I baked the cookies for ten minutes and when I removed the first pan, I noticed that the cookies smelled as if they were burning.  I quickly moved them from the cookie sheet to a cooling rack and checked the bottoms to see how badly they burned.  I was surprised that the cookies had just the normal brown color and there was no evidence of burning.  I baked the second sheet for nine minute, and they also had a burning smell when I removed them from the oven, but again, no burning on the cookies.  I am not sure what caused the burning smell, but the cookies did not taste burned.

I let the cookies cool and then tried one.  The first thing I noticed is the cookies are very thin and crisp (I like a soft cookie and will usually under bake the cookies so they remain soft).  The base dough doesn’t have a lot of flavor, without the chocolate chips, I might have thought it was a sugar cookie or snicker doodle.  The chocolate chips are real Hershey’s semi-sweet, and they provide all the flavor to the cookie.

My wife and I agreed that they are an average cookie, but personally I would take the extra time and make the cookies from scratch and end up with a great chocolate chip cookie rather than settle for one that is average.

Adventures In Food: Author: Kerry Howell

Tuesday, June 22, 2010

Chocolate Lava Muffins

While our kitchen was undergoing the remodel, I would read myself to sleep at night with the Alton Brown cookbook: Good Eats. Before falling asleep, I would use post-it notes to mark recipes that I wanted to make once the kitchen was operational. One of those recipes was Chocolate Lava Muffins.


Since the kitchen became functional, I have made this dessert several times, usually when we had guests over for dinner. This dessert is very easy to make, the hardest parts are: 1-Getting the muffin out of the pan intact (more on that later), 2-Not eating them all in one sitting.

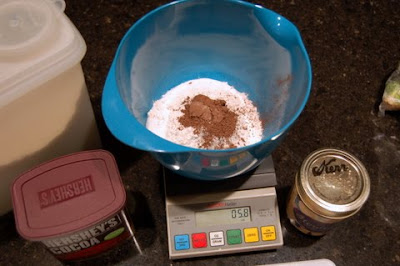
To make the muffin mix, I make a double boiler with the bowl from our KitchenAid stand mixer (without a handle) placed over a large saucepan with about of inch of water inside. I set the heat to medium and put the eight ounces of bittersweet chocolate (usually two bars) inside to melt with the four ounces of butter. While that is melting, I use my postage scale to measure the flour and sugar into another bowl and add the cocoa powder and salt. I just mix all the dry ingredients together with a large spoon.

Once the chocolate and butter melt, I added the vanilla extract (a homemade gift from our son and his wife), and stir the vanilla into the chocolate. Removing the mixing bowl from the saucepan, I dry the bottom and place it on the stand mixer and using the whisk attachment start mixing on medium speed.

The next step is adding the four eggs, one at a time into the chocolate. Once one egg is fully integrated, then adding the next egg. Once all the eggs are added to the mixture, the speed is set to low to add the dry ingredients. Alton recommends using a paper plate to add the dry ingredients, I just spoon the flour mixture into the mixer bowl with a tablespoon at little at a time until all the dry stuff is added.

Now comes the fun, set the mixer speed on high and let it mix for five or six minutes until the mixture lightens in color. This time it took the full six minute, but I could see quite a difference in the color. Once this was finished, I covered the bowl with plastic and put the mixture in the refrigerator until I was ready to bake the muffins.

Setting the oven to 350 degrees on convention mode (375 degrees conventional), I used a paper towel dipped in margarine to give the inside of each hole in a muffin pan a very even margarine coating. Then I spooned about 1 /4 teaspoon of cocoa powder into each buttered hole and took it outside to rotate the pan so that the inside of each hole is completely covered with cocoa. Getting a good coating is essential to releasing the finished muffins.

I spoon enough of the muffin mixture to fill each hole about half way, and then place it in the oven for eleven minutes to bake. Once the muffins are baked (though they don’t look baked as the centers are still runny) I remove them from the oven and let them rest for about two minutes before removing. I use a plastic knife and go around the side of each muffin to make sure the muffins are not sticking to the sides of the muffin pan.

Good Eats: The Early YearsGetting the muffins out intact is the biggest problem, I have tried directly lifting them out, but you have to wait until they cool quite a bit, I have turned them over on a plate which does work, but the tops may stick to the plate. Don’t turn them over onto a paper towel like I did this time, a little bit of the top of each muffin stuck to the towel. The best luck I have had is using two plastic knifes and prying on one side while lifting on the other. Let me know what works for you.

Alton recommends making a sauce of vanilla ice cream and espresso powder. We just serve them with vanilla ice cream on the side and everyone loves them. This is a very easy recipe to make, but guests are always surprised when we serve them.

Find the recipe at: http://www.foodnetwork.com/recipes/alton-brown/chocolate-lava-muffins-recipe2/index.html

Adventures In Food: Author: Kerry Howell

Saturday, May 8, 2010

Chocolate Sybil Cake

I asked my wife what dessert she would like for a mothers day meal, she said that chocolate is always good.  I visited the Foodnetwork.com site and performed a search on chocolate.  I started looking at the number of user review stars each recipes received and at the reviewers comments - I settled on a Paula Deen recipe for Chocolate Sybil Cake.

This recipe looked good and there was only one item I needed to purchase at the store: a 16-ounce can of Hershey’s chocolate syrup.  After my trip to the store, I set out a stick of butter and four eggs to warm to room temperature before I started mixing.

I used our KitchenAid stand mixer with the spatula beater bar and creamed the 1 /2-cup of butter with the one-cup of sugar for several minutes until fluffy.  I added the four eggs one at a time while beating the mixture well after each egg.  I added the salt and baking powder to the mix (I need to look for some different baking powder without aluminum, which is bad for you).  I added the one-cup of flour and continued to mix.  For the final ingredients, I added the can of chocolate syrup and the teaspoon of vanilla extract.

I poured the cake batter into a greased and floured glass Pyrex 9x13 inch baking pan and placed it in a 350-degree oven for thirty minutes.  While the cake cooked, I went outside and planted a cherry tomato plant that will sit on our patio.

A few minutes before the cake was finished cooking, I was back in the kitchen and saw that while the cake is baking, you mix the frosting and pour in on the cake when it comes out of the oven.  I had missed that step!  It really does pay to read the entire recipe before you begin cooking.

I quickly followed the instructions for the frosting by heating one stick of butter with 1 /2-cup of chocolate chips, one-cup of sugar, and 1 /3-cup of evaporated milk.  I brought this too a boil for about three minutes then added the vanilla and 1 /2-cup of chopped pecans.

The cake had been out of the oven for about a minute when I poured the hot frosting over the top of the cake.  With everything being nice and hot, it was easy to get an even coating of the frosting over the entire cake.

We each sampled a piece of the cake with a little bit of vanilla ice cream after dinner last night.  I was surprised that the cake had compressed to about an inch thick after pouring on the frosting.  The resulting cake is a dense but very moist cake with a strong chocolate flavor.  It is very good and I would rate it four out of five stars.  For an absolute chocolate overload, I think we both still prefer the Flourless Chocolate Cake.

Find the recipe at: http://www.foodnetwork.com/recipes/paula-deen/chocolate-sybil-cake-recipe/index.html

Adventures In Food: Author: Kerry Howell